Keith Lango: VTS42-47 Stepped to Polished Animation

Semester 2 Week 7 (2018/03/13)

Research

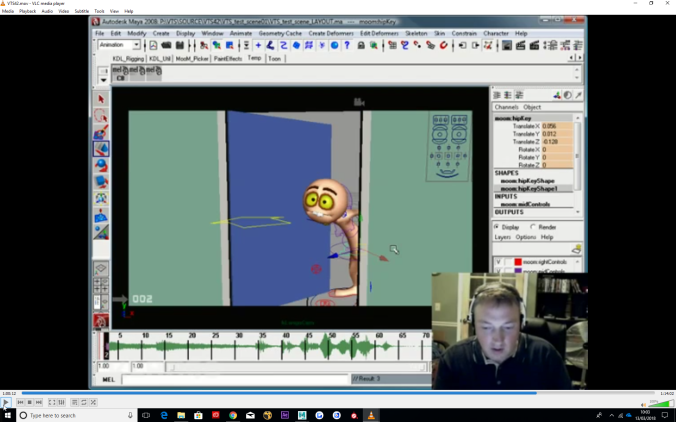
These are my notes from watching Keith Lango’s video series on his workflow for a shot of animation.  It’s useful to see how much of his workflow focuses on key poses, primary breakdowns and secondary breakdowns (stepped). He spends most of his efforts on these poses, making sure that the drawings of the silhouettes are simple and have appealing curves. A lot of time is spent on creating arcs in the movements. These poses are then timed out. The splining phase is relatively short as the poses, arcs, and timing are working well before this stage.

VTS42

Start with the emotion of the character. Look for the shape of the dialogue. What is the energy of the dialogue? Does it pop up and crash, rise slow and crash etc.?

Study the line of action of different poses in the body mechanics. Even when the feet are off screen you will still be able to sense the balance. Think of feet as the foundation. What direction will the feet point to convey the stance? Emotion affects the pose of the action. Act out the motions and take note of what all your poses are. Understand what your body is doing, by doing. Animation is the believable condensation of life. 

Thumbnail your motion analysis; keys and primary breakdowns. Start by thinking through the motion (planning).

Setting up keys:

Create counter rotations for curves in the spine. Start with the hips (the point of movement in the example). 

Screen Shot 03-13-18 at 10.03 AM

Pay attention to the curves in the silhouettes of the poses.

Pose reversal. Offscreen poses can still affect on screen poses.

Build asymmetry in the facial pose. Think from squash to stretch and closed to wide in the facial pose too.

VTS43 The primary breakdown

In the example, Lango is aiming for an under-arch.

Think about the timing of separate actions e.g. the head comes through the door almost at the same time as the door opening.

This will then determine the position of objects along their motion path during the inbetween.

Think of how the limbs will be offset on the inbetween. What is moving faster/leading versus dragging?

The core of the body/hips can act as the carrier of the upper body if the hips are the pivot, therefore arrive quicker.

Think of the changing angles. Rotate angles of moving parts but find a balance. You want the torso to feel alive but not be distracting. Always consider ways to improve your key poses in the context of your breakdown too.

Think of how the silhouette morphs between poses. You don’t want it watery or strobing. Keep an eye on the poses which Maya tries to fill in. Pick points in the silhouette that might stay in the same place. Think of the drawings. It’s all just shapes moving on a 2d screen.

VTS44

Build the primary breakdown in the middle and then the smaller breakdowns like eases. The primary breakdown defines the nature of the move. Draw a line between the key poses and primary breakdown.

Screen Shot 03-13-18 at 12.33 PM 001

Get feedback after the primary poses and after the secondary breakdowns both.

VTS46 Timing

Start by planning, then space the frames according to your plan. The action should hit a few frames before the sound. 

Depending on how fast and slow the movement is you will need to add more ease to make the movement visible.

VTS47 Cleanup

Start with the hips and move up the torso.

Clean up the peaks and valleys of the graph. Clean up your geometry penetrations.

Lango adds extra character to the rotations after the f-curves are polished.

Dialogue animation is emotional. Get your narrows and wides and the jaw moving and focus on emotion instead of the nitty gritty sounds.

Every shape is unique, we’re not robots.

Start with the bigger shapes e.g. the squash of the eyes and then work smaller. Make sure that the shapes work in an emotional way.


Reymond Blend Shapes

Semester 02 Week 03 (2018/02/12)

Technical, Research and Artistry

I sculpted the blendshapes for our character Reymond. I hadn’t created blendshapes before but Andrew had some great research at hand to help me out. He kindly shared a tutorial with me that contained a detailed workflow of all the different sections of the face that would need to be sculpted. This was very helpful as I had thought to approach this by copying the faces in the animatic which would have been slower to plan out.

This tool, abSymMesh, was recommened in the tutorial as a way of checking if the mesh is symmetrical, which it wasn’t! Making Reymond’s face symmetrical was more time consuming than predicted as mirroring one side of his face over was tricky to reconnect.

Along with the list of shapes in Andrew’s tutorial, I mostly followed along with this tutorial also using the shape editor in Maya 2017.

Maya 2017 Shape Editor

These are the resulting shapes after sculpting and duplicating/mirroring to the right.

Andrew is going to complete Reymond by attaching the controls to the blendshapes and adding more body controls. The mouth will be driven by joints more than by my blendshapes.

Rendering and Compositing Look Development

Artistry, Technical and Research

Semester 02 Week 04 – 05 (2018/02/19 – 2018/03/04)

Artistry

These are some renders and composites from the start of semester 2 to get an idea for what the characters might look like in scene 03 – the road to Reymond. It still needs a lot of work. Reymond wasn’t casting enough light on his surroundings with the emmisive set -up so I’ve tried making him a mesh light in the images below and added a glow to his emmisive pass in Nuke.  This causes bad light bleed around his mouth. I’ll try light linking for his cast light.


Research and Technical

Andrew found this cel shader script for Arnold 5 which works much better than relying on hard directional lights! It’s free for download here:

https://encci20.blogspot.co.uk/2017/11/cell-shader-tool.html

The light and shadow color are controlled by a ramp. Kerry and I are setting up the cel shader in each individual asset file. A little extra work is therefore needed to reconnect every referenced asset in the layout files to the same ramp so that light and shadow HSV can be changed from one control point. This shading network also doesn’t seem to have an imput for height maps unless we reroute to an aiStandardSurface.

Cell Shader Tool – Arnold 5 – Maya from Steffano Richi:

Artistry

These are some of the updated assets that I worked on with the cel shader. We’re trying to keep our asset textures broad, abstract and brushy so that they read like a painting from afar, especially when combined with the cel shader which simplifies the shading. I’ve also made a warm and cold version of the tree textures to help with our scene palettes.


This is our progress so far with rendering and compositing our characters in an environment. This is in layout 02 which Kerry was working on. The cel shader doesn’t work with the default AOVs from Nuke so this is only composited with the zdepth pass. It needs more work. Mike has also pointed out that we need to stage the characters with the lighting more.  This seems tricky with our current light-set up and workflow so it needs more research and experimenting.


I’ve started texturing the inside of the house while Kerry is working on the house exterior this week too. I was worried that the cel shader only seemed to work with directional lights but I’ve found that it works with the aiAreaLight also. Light will be coming from the doorway and boarded windows at the front and from a caved-in roof at the back.


Alec and the others have suggested using geometry with alpha gradients for light beams. I’ll also be developing the red strangling version of the house interior light/textures.